About this video
Video by Vitek Innovation: Instagram Profile
What You'll Build
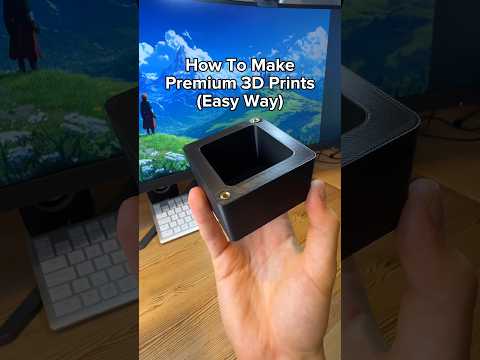
This tutorial covers designing a two-piece, screw-together 3D print — inner body, outer sleeve, and threaded cap — in Fusion 360, using its built-in Thread tool to create a real, functional screw thread.
Tools & Materials Used
- Autodesk Fusion 360 – free CAD software for hobbyists, used for the entire design
- Bambu Studio (or any slicer) – for splitting and arranging the print
- FDM 3D printer – any brand works
- PLA or PETG filament – both hold fine thread detail well
Step-by-Step: Designing the Threaded Body
- Start a new design in the standard Design workspace and sketch on the XY plane
- Draw two concentric circles using the Circle (C) and Dimension (D) shortcuts — an inner circle around 40mm in diameter, with the outer circle offset about 5mm
- Extrude the outer wall 30mm tall, then hide that body and extrude the inner wall as a New Body (not Join) so the two stay separate, adding a few extra millimeters of height for grip
- Extrude a matching cap from the top face of the outer circle's sketch
- Apply Fusion's built-in Thread tool (Create > Thread, just below Hole) to the mating cylindrical faces — tick the box that models it as real geometry (not just a preview) and the box that remembers the size for next time
Getting the Fit Right
- Use Section Analysis (under the Inspect menu) to slice through the model and preview clearance before printing anything
- Offset the mating faces by roughly -0.2mm each (about 0.4mm of total clearance) so the printed threads engage smoothly instead of binding
- Add a small fillet (around 0.3mm) to all eight thread edges — sharp corners are hard for FDM printers to resolve cleanly, and rounded edges make it much easier to start threading the two halves together
Exporting and Slicing
Save the file, then export as STL (not the native F3D format, which only opens in Fusion). In Bambu Studio, import the STL, split the combined mesh into separate objects, then use the auto-arrange feature to lay each part on its largest face for the most reliable bed adhesion.
FAQ
What clearance should I use for 3D-printed screw threads?
Around -0.2mm per face (0.4mm total gap) is a solid starting point for most FDM printers — adjust slightly based on your machine's calibration.
Do I need a paid Fusion 360 plan to use the Thread tool?
No — the Thread tool is part of Fusion 360's standard toolset, including the free personal-use plan.
Can I reuse this method for other projects?
Yes — the same inner-wall/outer-wall/thread workflow works for jars, spice containers, lens caps, or any twist-lock enclosure.
Why bother adding fillets to the threads?
Fillets round off sharp corners that FDM printers struggle to print accurately, and they make the two halves much easier to align and start threading by hand.